Full House Makeover: Saving a Classic Island Bay Gem
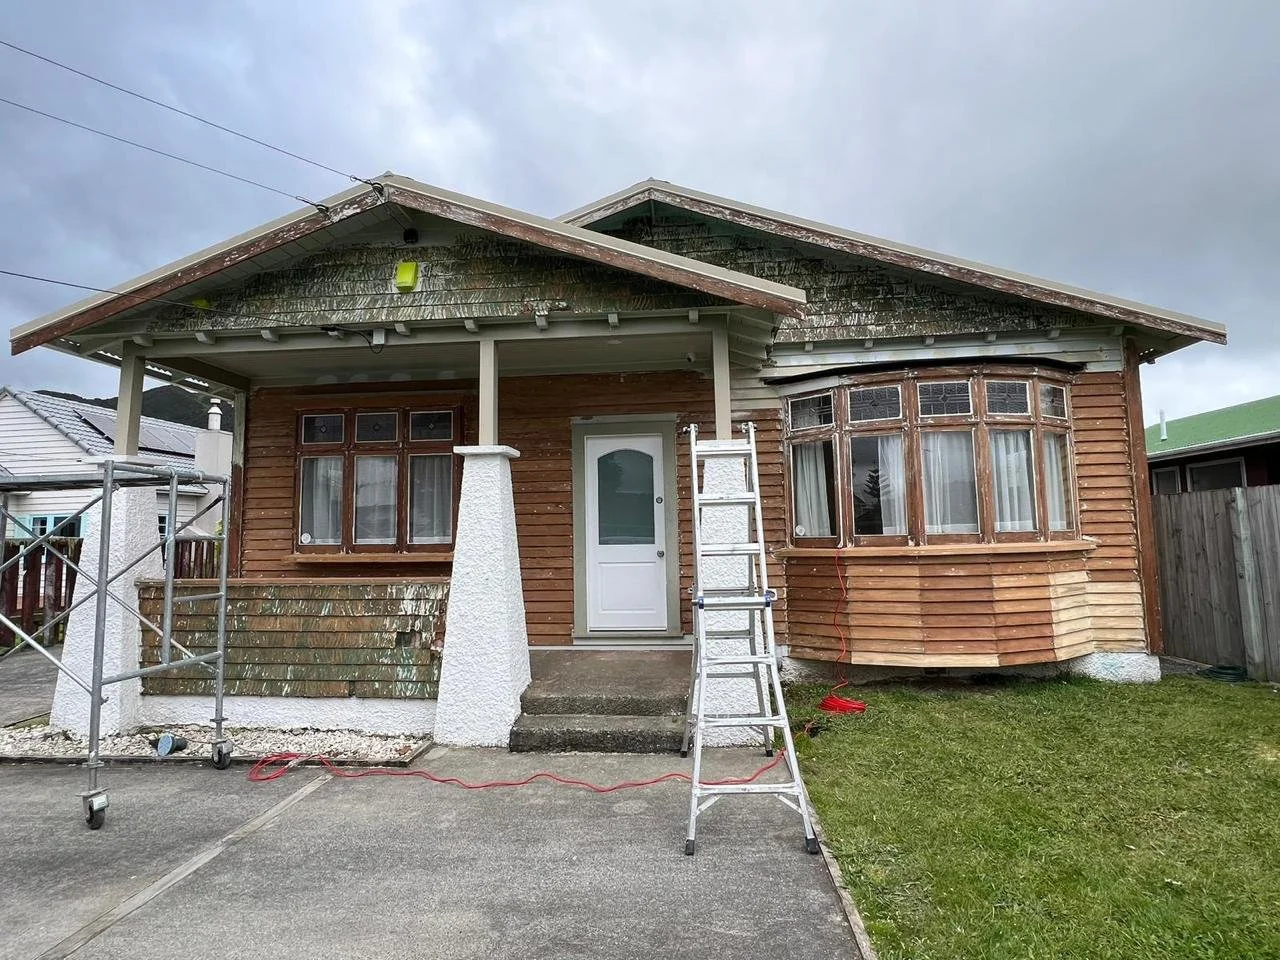
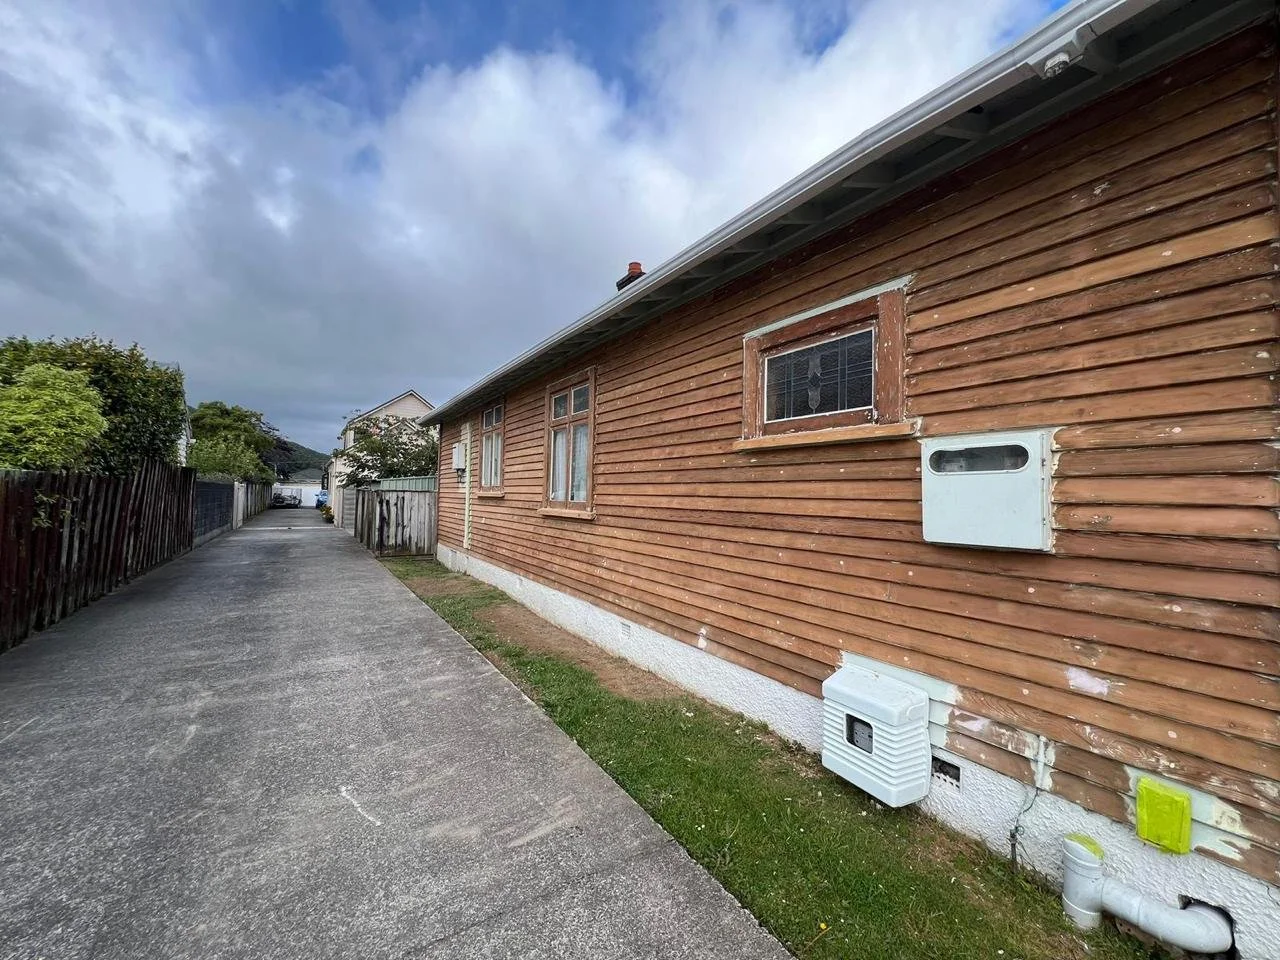
When the homeowners called us, they knew they needed more than a quick coat of paint. The exterior was badly flaking, especially under the eaves and around the beautiful bay windows (as you can see in the photo!). Inside, the walls were showing wear and tear, and needed some professional attention to feel modern and fresh.
This was a full "strip-it-back-and-start-fresh" job!
How We Brought the Whole House Back to Life
Our approach was systematic: we tackled the prep work first to make sure the paint would last for decades.
1. Exterior Restoration (Curb Appeal and Protection)
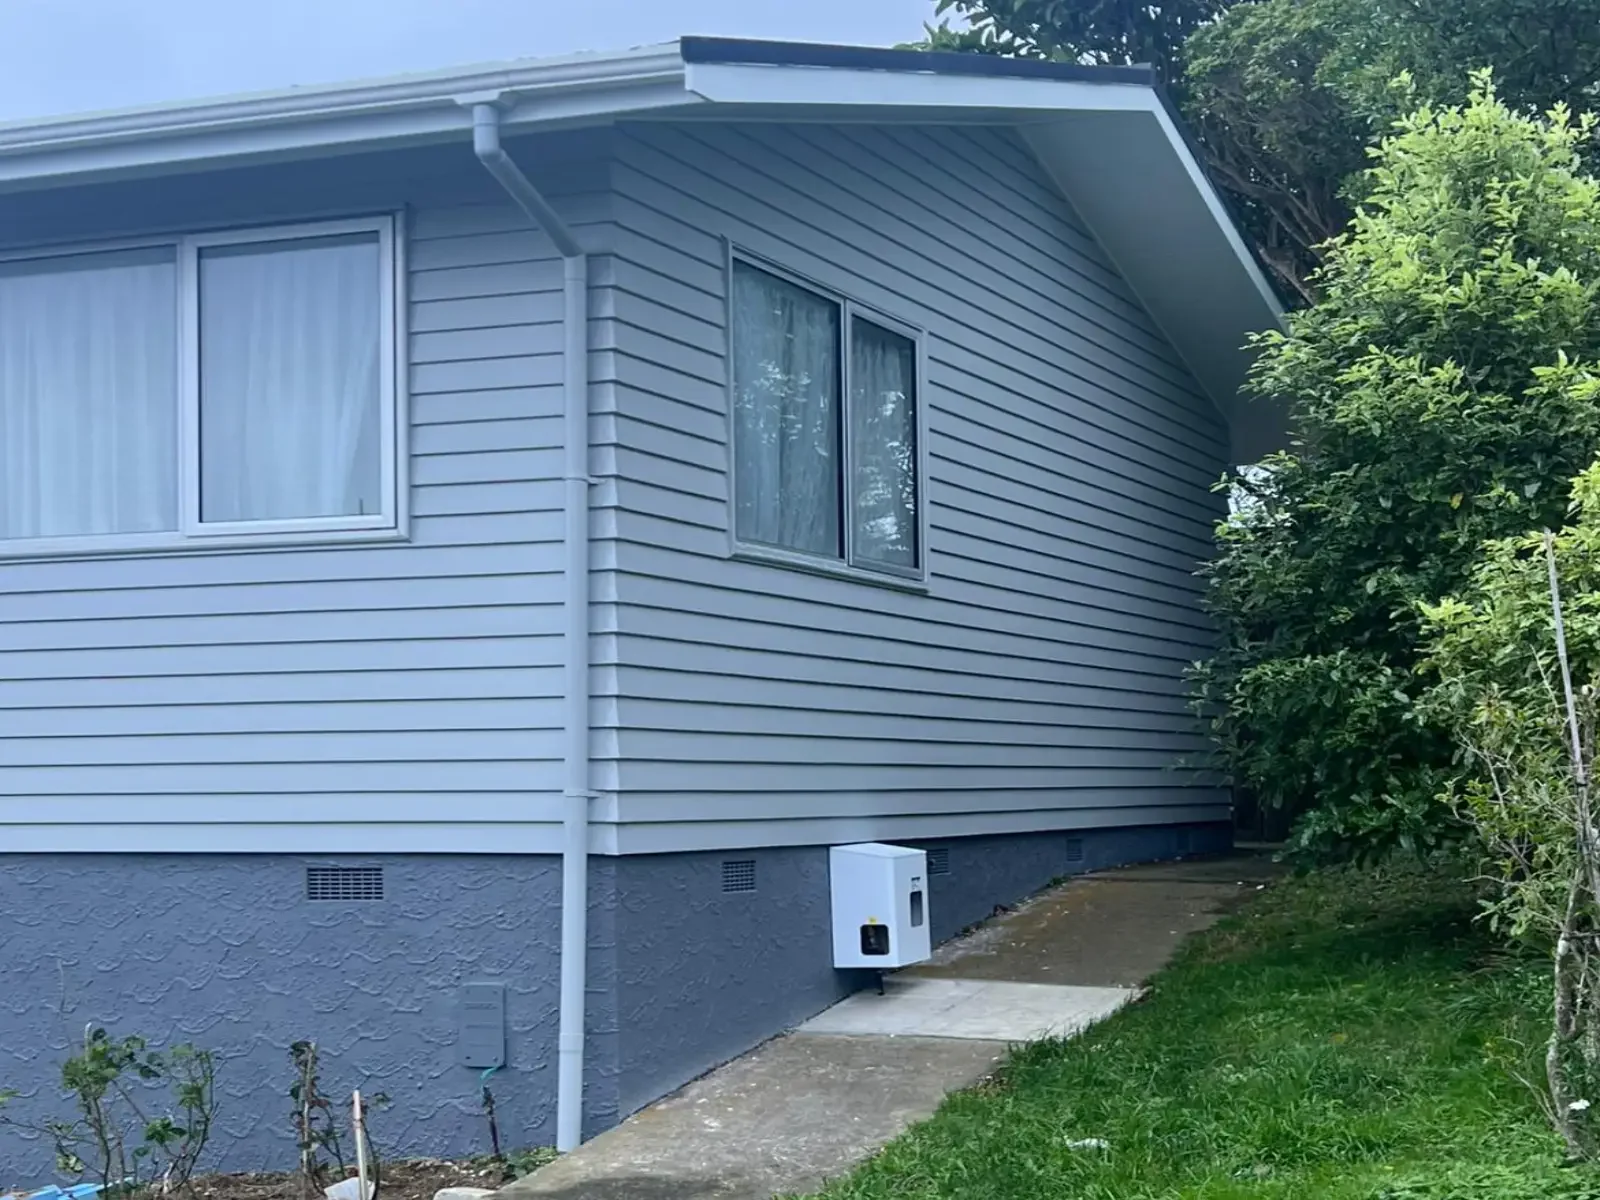
We set up our scaffolding and got to work. No shortcuts here! We thoroughly stripped the flaking areas, meticulously plastered and patched all the woodwork, and sanded everything smooth. Once the surface was perfect, we used high-grade primer and applied two coats of durable exterior paint that's built to withstand the Wellington wind and rain.
The difference a proper prep makes is night and day!

2. Flawless Interior Refresh
With the exterior locked down, we moved inside. The interior required precise Gib stopping and plastering to make sure all walls were perfectly smooth before applying the new colour palette. Working room-by-room, we created clean lines and a beautiful, contemporary feel that the family absolutely loves.
This was a major project, but seeing the whole house transformed—from the newly protected exterior siding to the crisp, fresh walls inside—makes us proud to be your local painters.